Custom HTML
Inject custom codes to your website
Code is the language that tells your web browser what it should look like and what it should do. Three of the core code types are HTML, CSS, and Javascript.
HTML tells your browser what content to show and where it should go.
<p>This is a paragraph.</p>CSS is responsible for the look/style. It allows you to apply a unique style to one HTML element at a time. You assign CSS to a specific HTML tag by using the style attribute with any CSS properties defined within it.
<p style=“color: blue;“>This is a paragraph.</p>Javascript is a prototype-based, multi-paradigm scripting language that supports object-oriented, imperative, and functional programming styles.
The <script> tag is used to define a client-side script.
<script>
document.getElementById(“demo”).innerHTML = “Hello JavaScript!“;
</script>
If you want to add any of the above-mentioned codes to your site, you can use our Custom HTML element to do so!
1. Add HTML Element
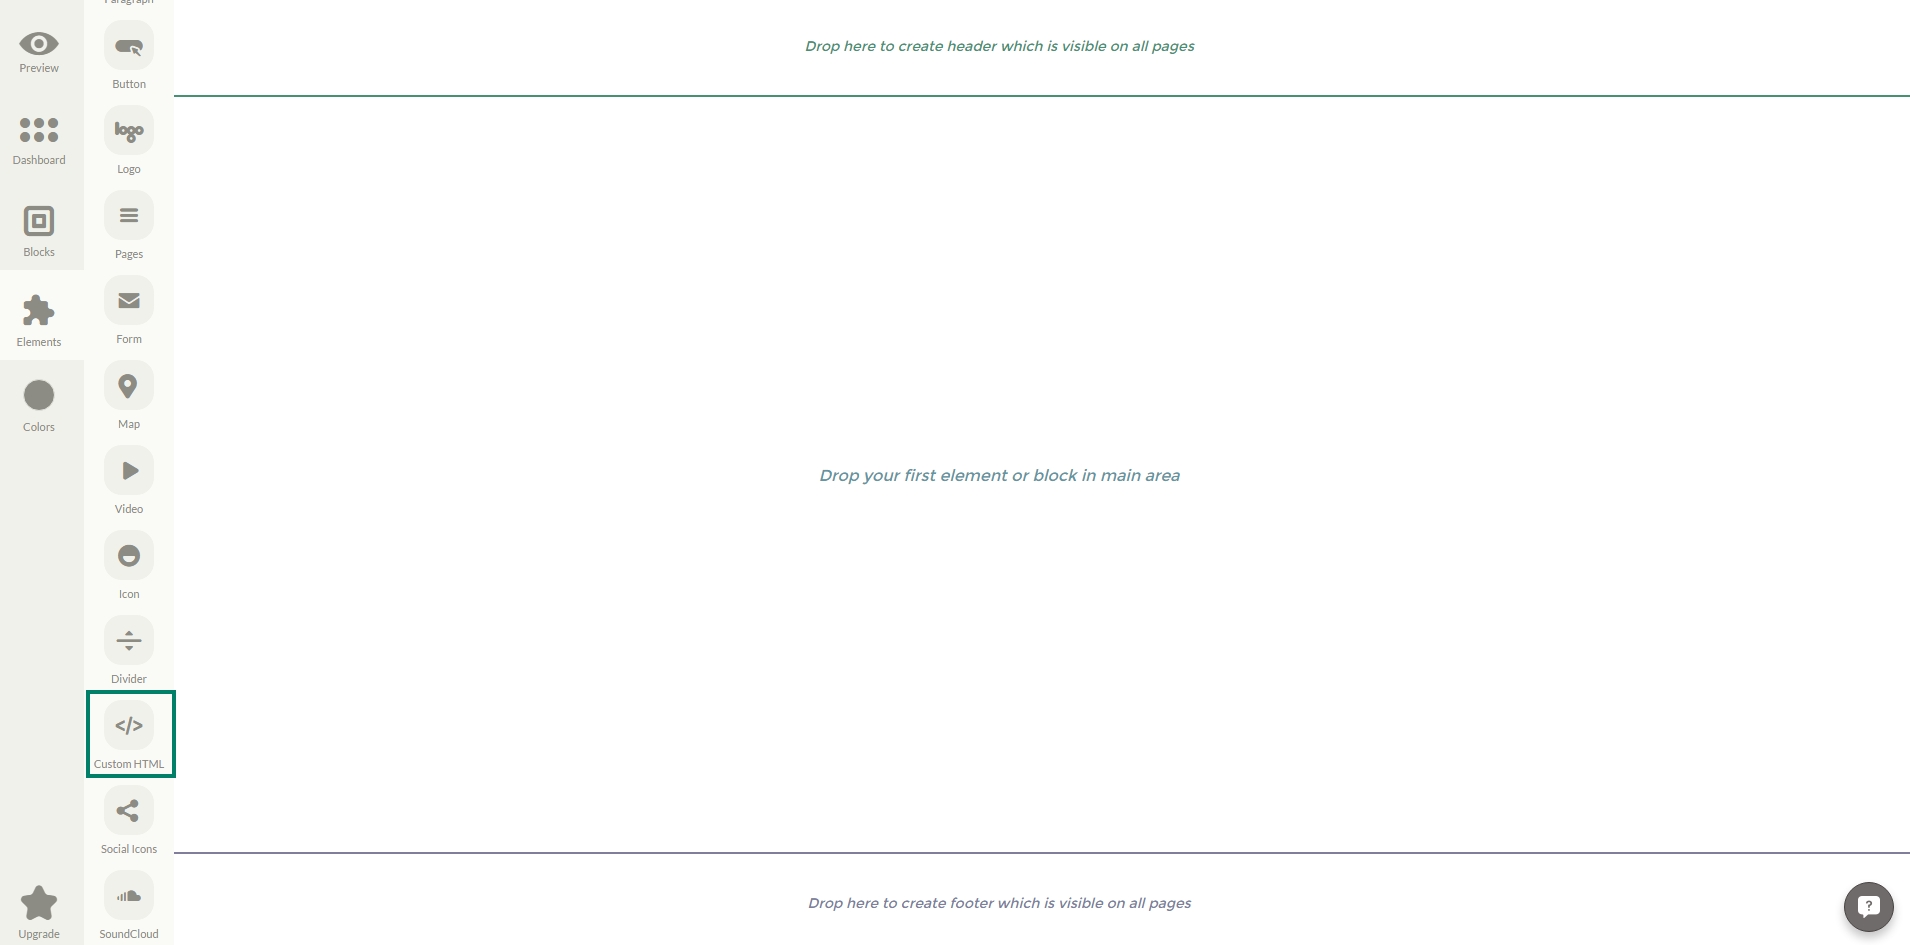
To get started, just drag and drop the ‘Custom HTML’ icon from the Elements section to the crafting area.
2. Insert HTML
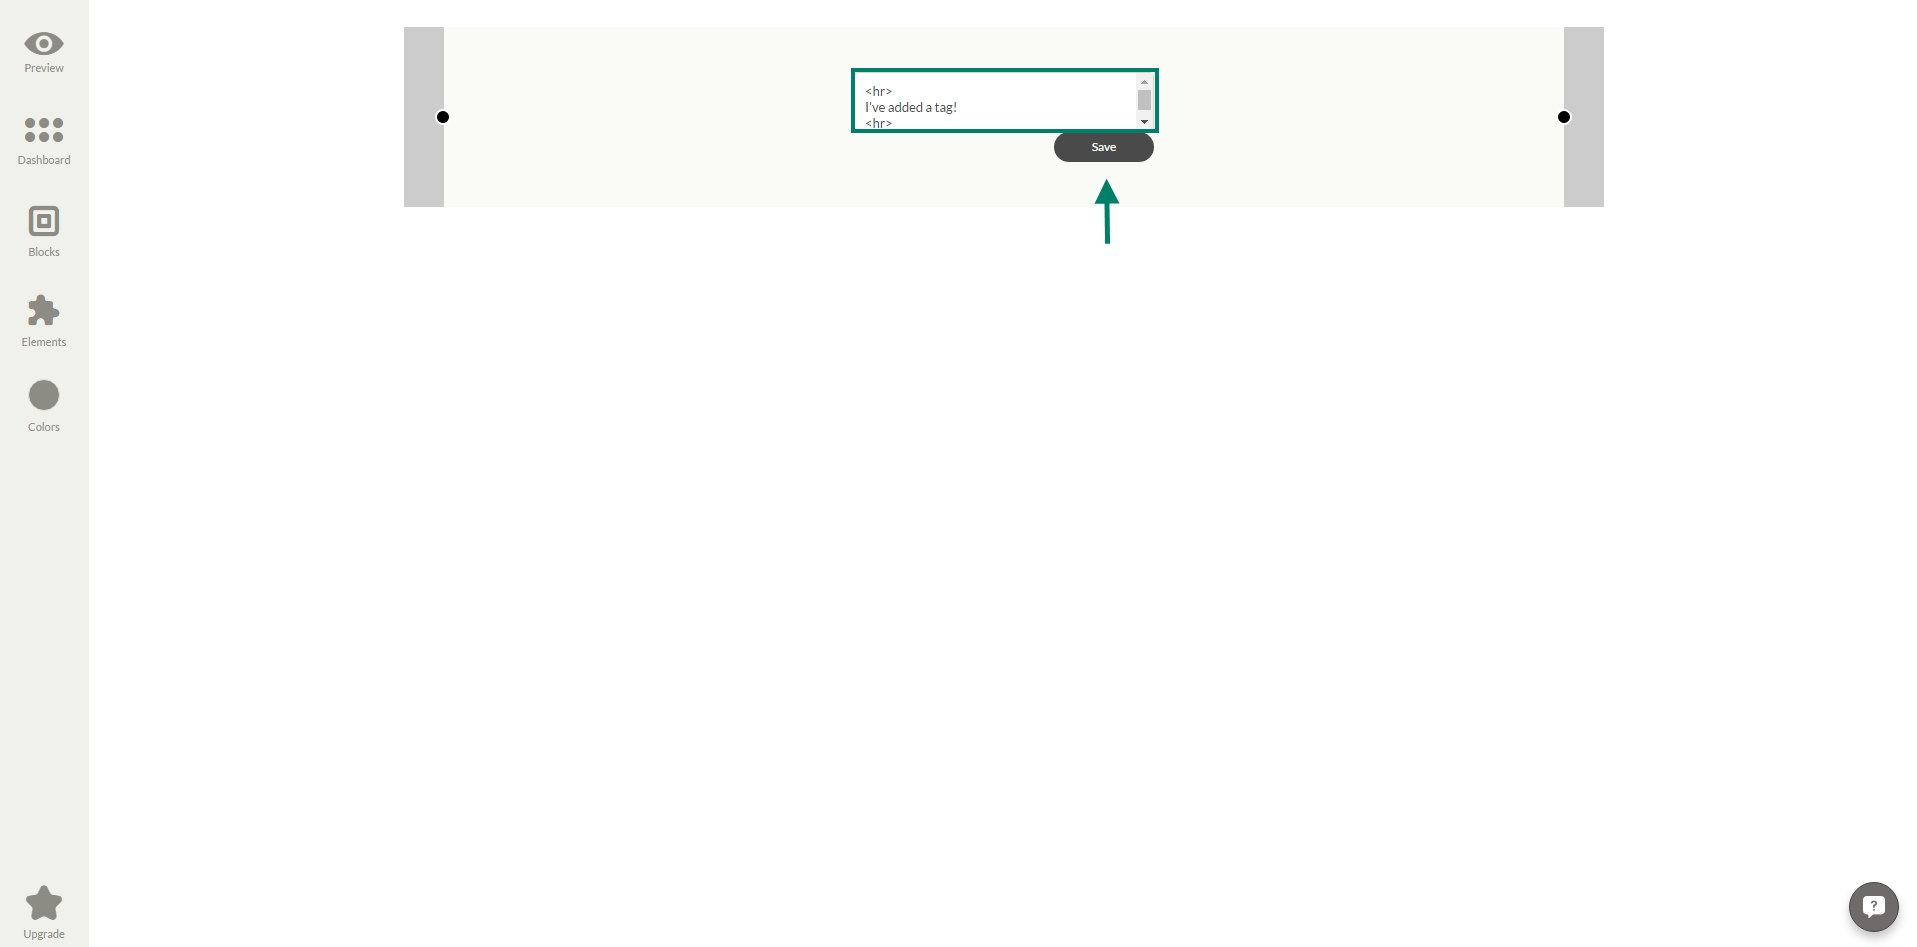
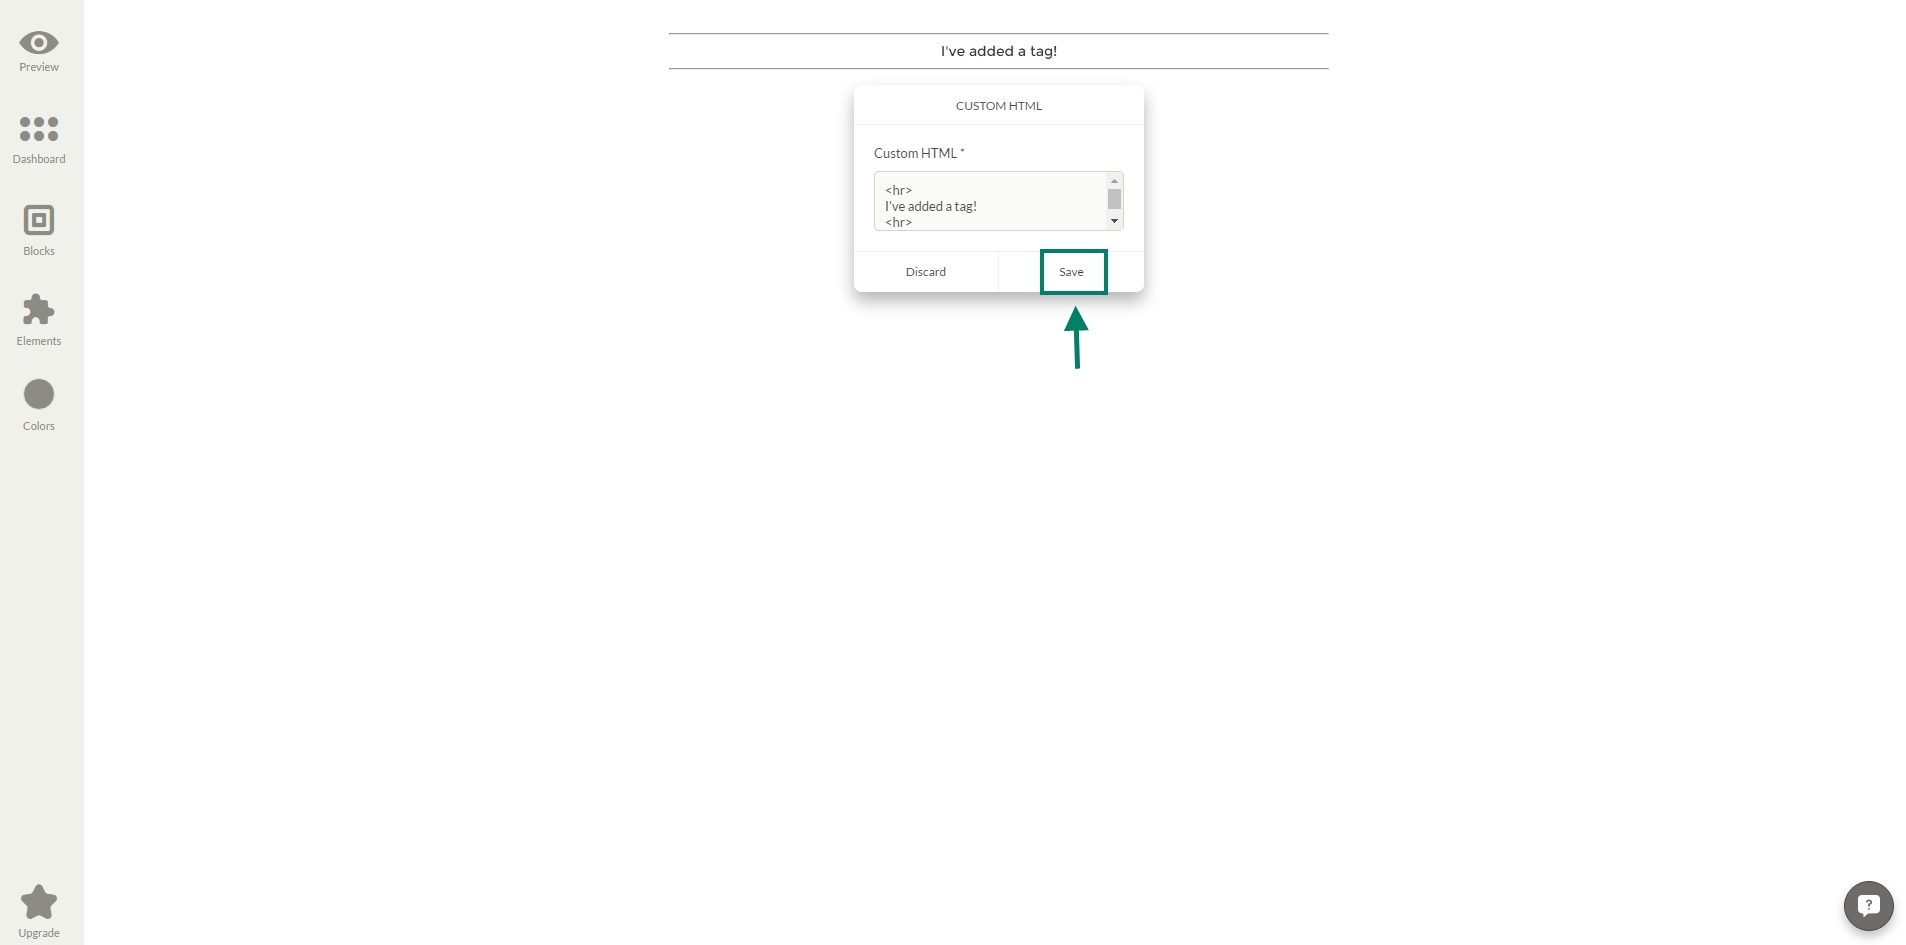
Insert the desired HTML tags and click the ‘Save’ button.
3. Crop the element
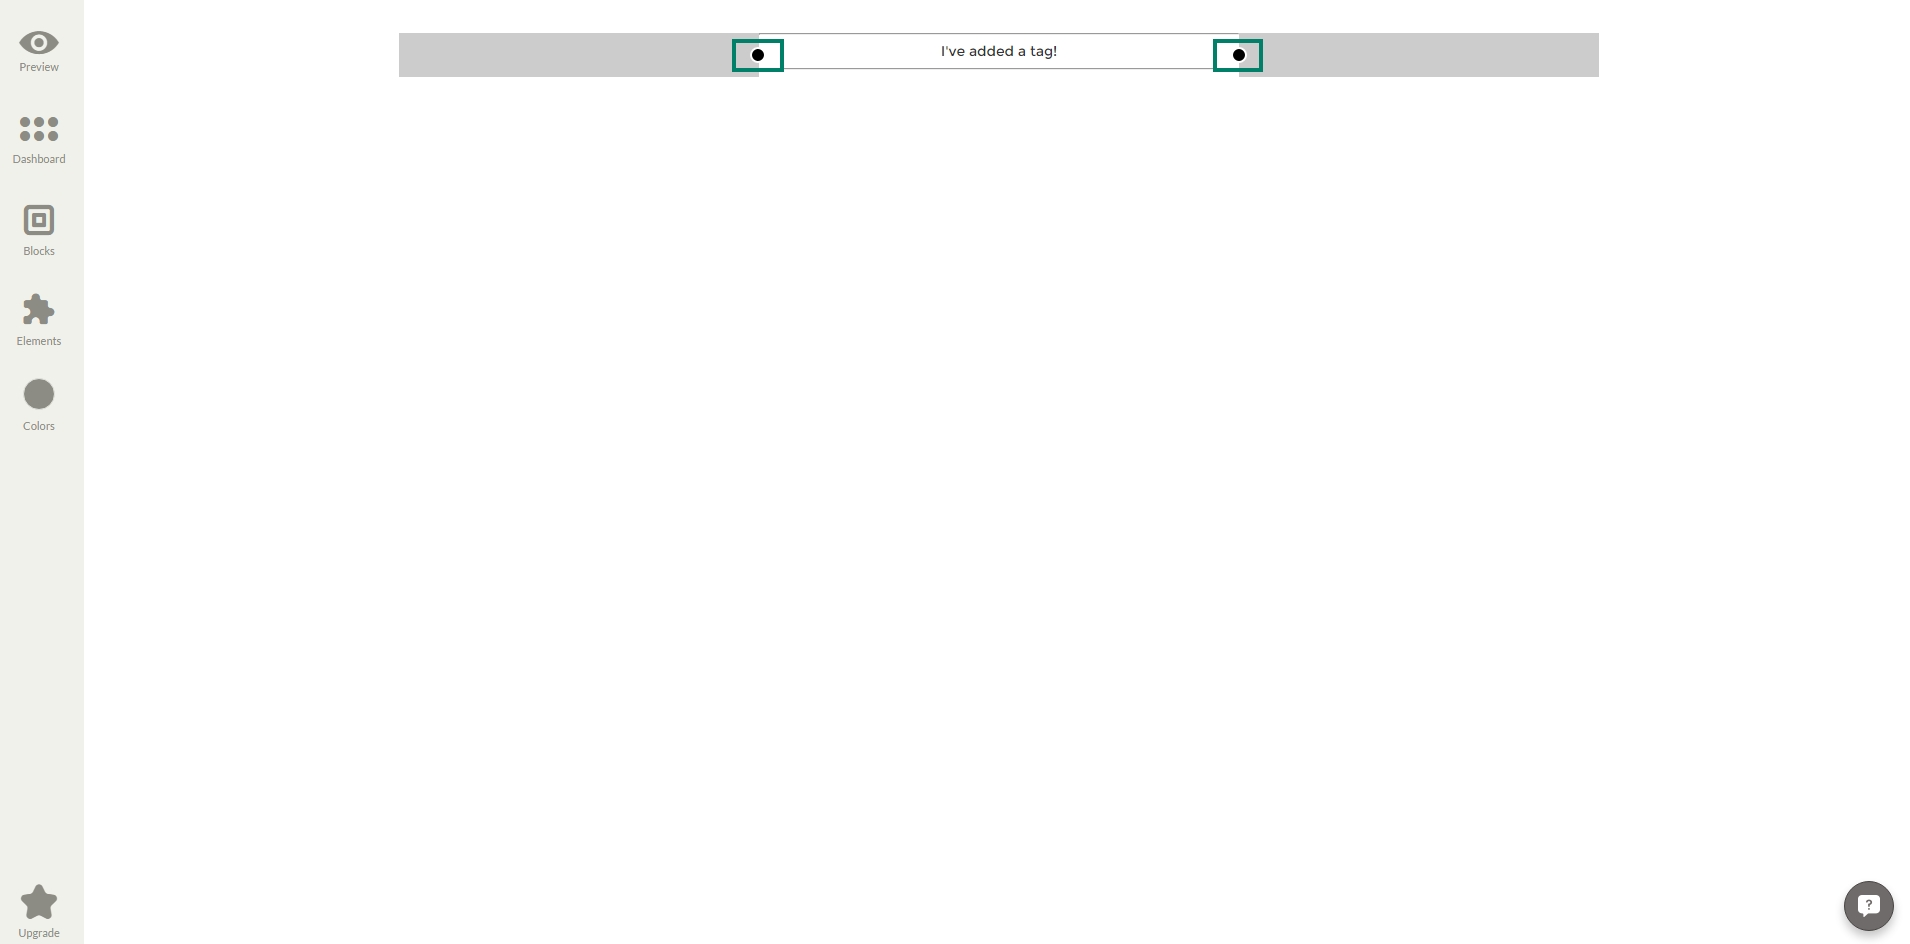
To crop the added element, push the Crop Pointers and move them.
4. Edit HTML Element
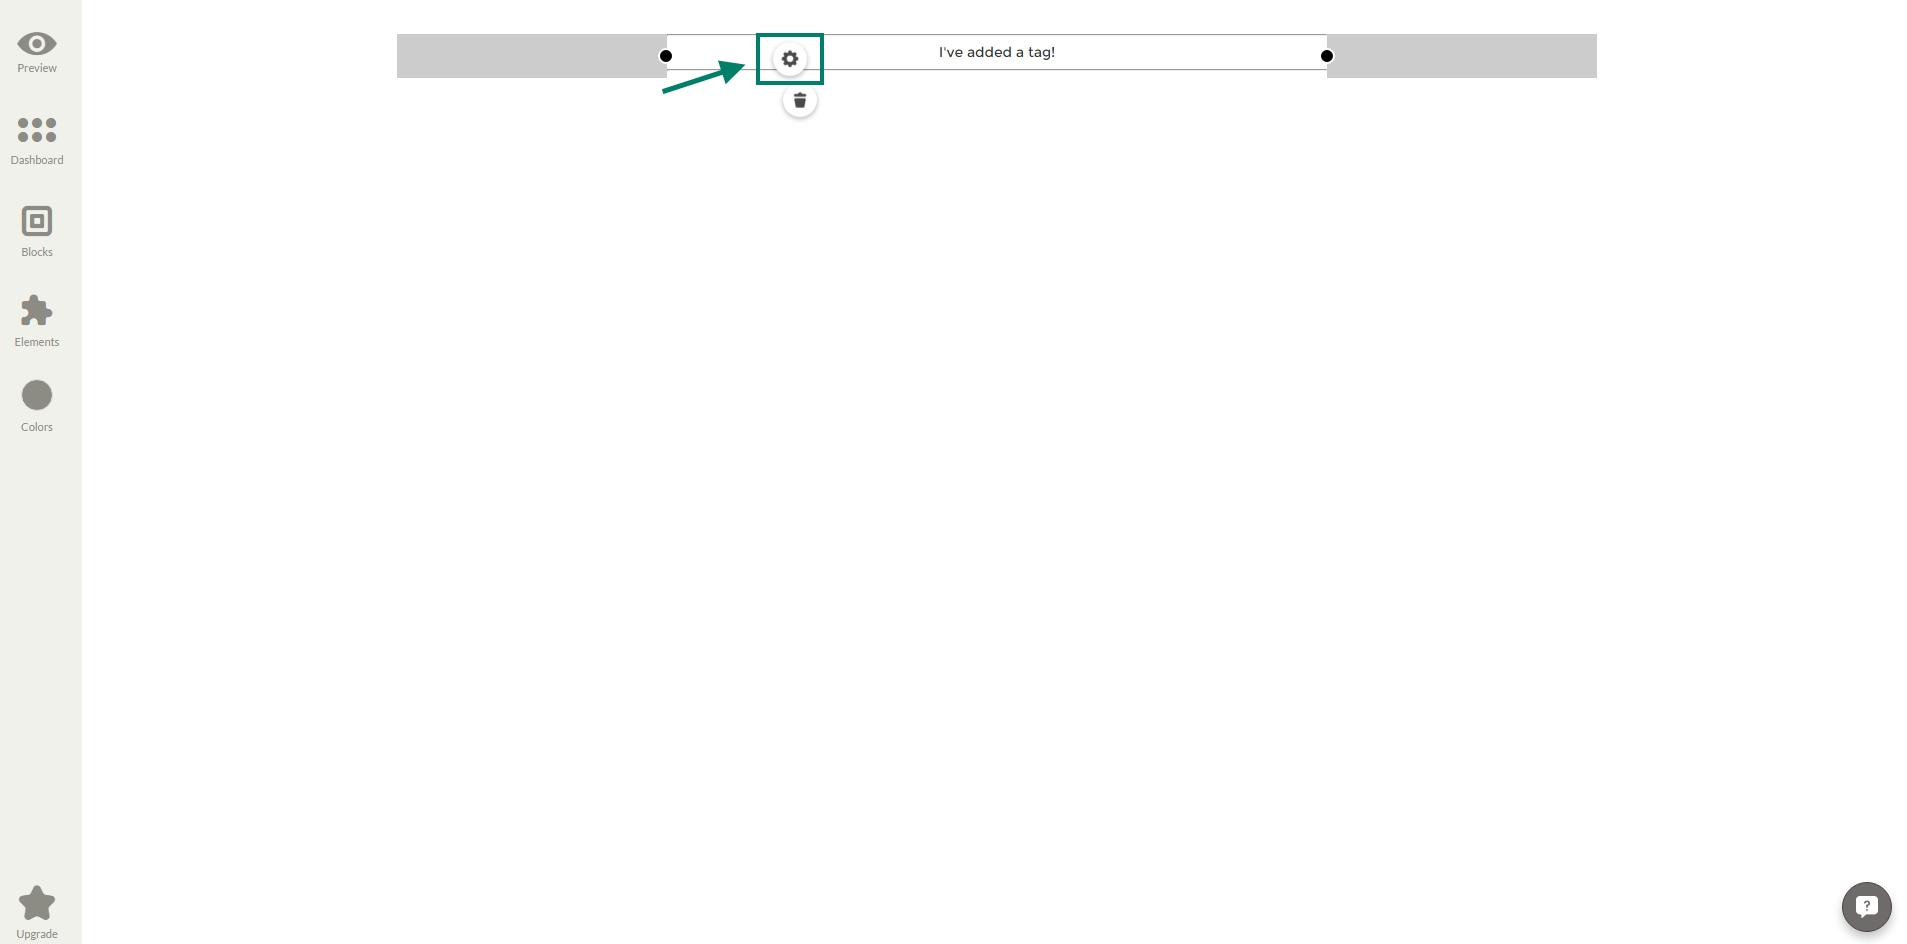
Edit the Custom HTML Element by simply clicking on it and choosing the desired option from the ‘Settings’.
4. Alignment
To change the alignment settings of the Custom HTML Element, click on the ‘Alignment’ icon you’ll have three options available: top, center, bottom, just choose the one, you prefer.
5. Delete
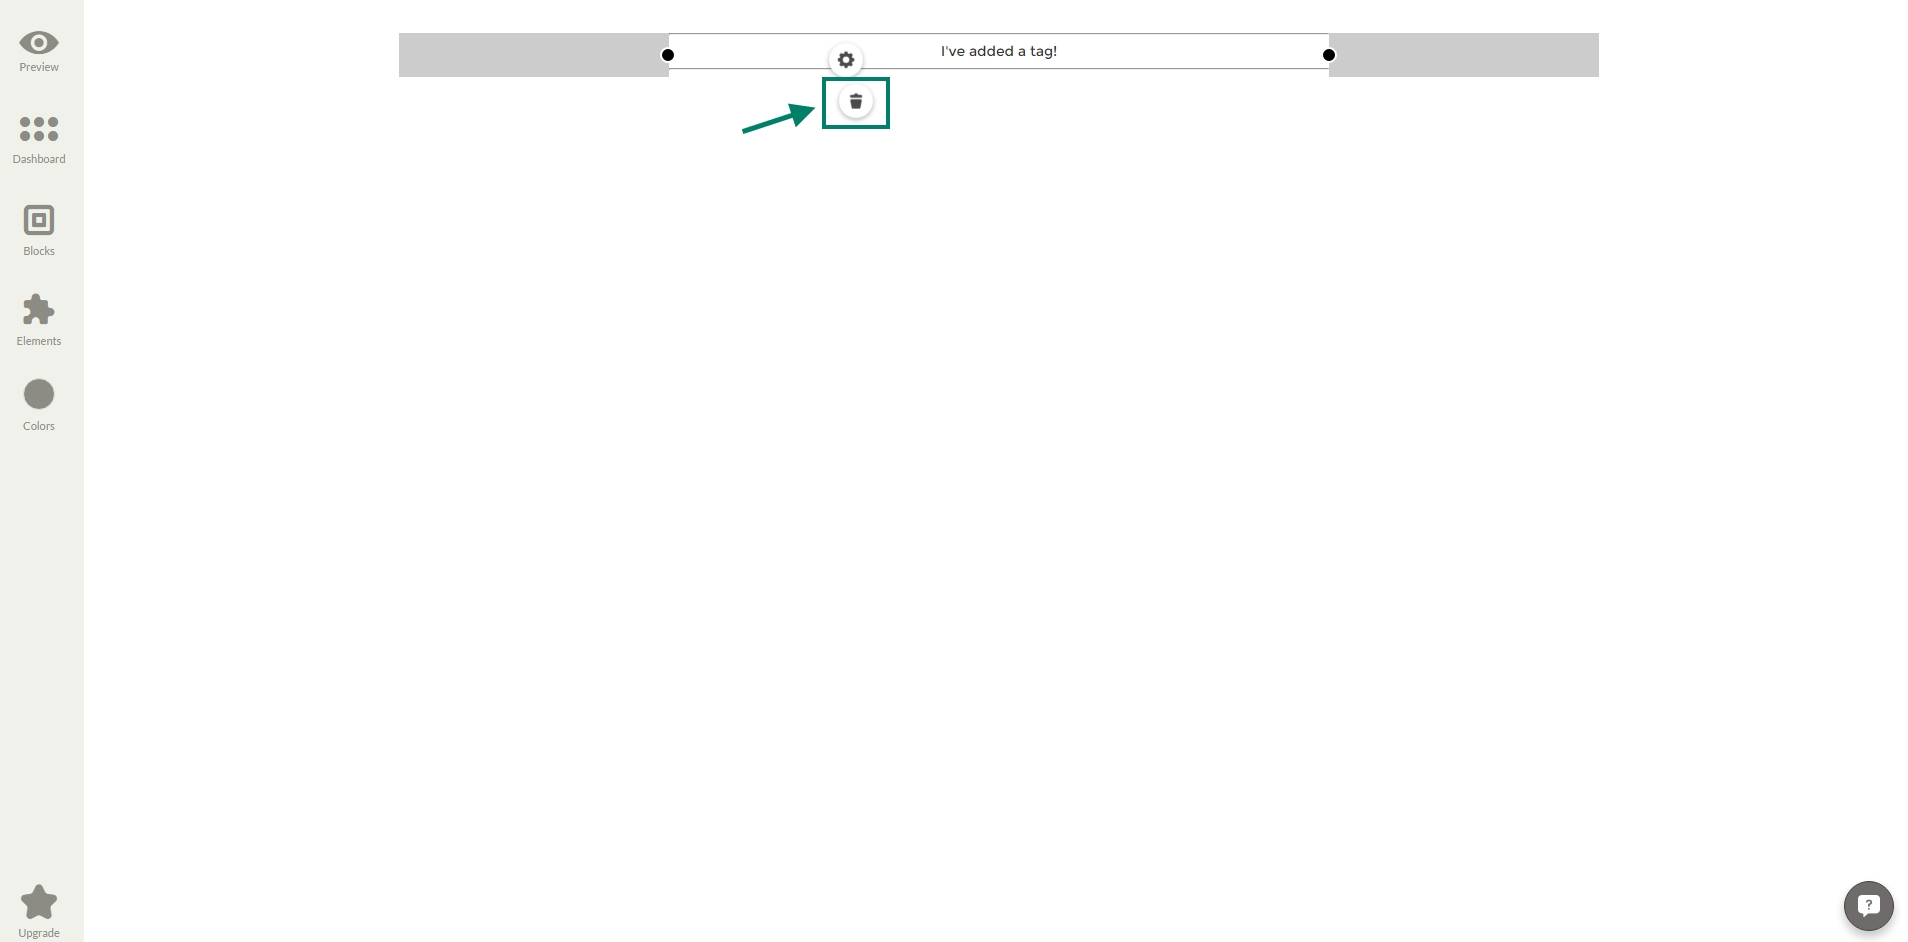
If you don't need the Element anymore, Click on the ‘Trash’ icon to remove it from your page.
Need further help? Just hit the Chat Box in the lower right corner and drop us your questions. You'll surely receive a timely and friendly support from our team.
Last updated
Was this helpful?